CloudWatch Logsを試す
今日はCloudWatch Logsを試します。
IAMの設定
CloudWatch Logsを使うために、IAM Roleを用意しておきます。
以下のようなIAM Roleを用意しておきます。
{
  "Version": "2012-10-17",
  "Statement": [
    {
      "Effect": "Allow",
      "Action": [
        "logs:*"
      ],
      "Resource": [
        "arn:aws:logs:*:*:*"
      ]
    }
  ]
}
インスタンス起動時に、このIAM Roleを設定します。
セットアップ(Amazon Linux)
Amazon Linuxは「amzn-ami-hvm-2014.09.1.x86_64-ebs (ami-4985b048)」を選択しました。
Amazon Linuxの場合は、yumでエージェントをインストールすればOKです。
$ sudo yum install awslogs
その後、エージェントを起動させます。
$ sudo chkconfig awslogs on
$ sudo service awslogs start
セットアップ(CentOS)
CentOSは「CentOS 6 x86_64 (2014_09_29) EBS HVM-74e73035-3435-48d6-88e0-89cc02ad83ee-ami-a8a117c0.2 (ami-13614b12)」を選択しました。
CentOSの場合はセットアップスクリプトをダウンロード、実行します。
初期設定で東京リージョンを指定しました。
$ wget https://s3.amazonaws.com/aws-cloudwatch/downloads/latest/awslogs-agent-setup.py
$ sudo python ./awslogs-agent-setup.py --region ap-northeast-1
Launching interactive setup of CloudWatch Logs agent ...

Step 1 of 5: Installing pip ...DONE

Step 2 of 5: Downloading the latest CloudWatch Logs agent bits ... DONE

Step 3 of 5: Configuring AWS CLI ...
AWS Access Key ID [None]:
AWS Secret Access Key [None]:
Default region name [ap-northeast-1]:
Default output format [None]:

Step 4 of 5: Configuring the CloudWatch Logs Agent ...
Path of log file to upload [/var/log/messages]:
Destination Log Group name [/var/log/messages]:

Choose Log Stream name:
  1. Use EC2 instance id.
  2. Use hostname.
  3. Custom.
Enter choice [1]: 1

Choose Log Event timestamp format:
  1. %b %d %H:%M:%S    (Dec 31 23:59:59)
  2. %d/%b/%Y:%H:%M:%S (10/Oct/2000:13:55:36)
  3. %Y-%m-%d %H:%M:%S (2008-09-08 11:52:54)
  4. Custom
Enter choice [1]: 1

Choose initial position of upload:
  1. From start of file.
  2. From end of file.
Enter choice [1]: 1
More log files to configure? [Y]: N

Step 5 of 5: Setting up agent as a daemon ...DONE


------------------------------------------------------
- Configuration file successfully saved at: /var/awslogs/etc/awslogs.conf
- You can begin accessing new log events after a few moments at https://console.aws.amazon.com/cloudwatch/home?region=us-east-1#logs:
- You can use 'sudo service awslogs start|stop|status|restart' to control the daemon.
- To see diagnostic information for the CloudWatch Logs Agent, see /var/log/awslogs.log
- You can rerun interactive setup using 'sudo ./awslogs-agent-setup.py --region ap-northeast-1 --only-generate-config'
------------------------------------------------------
その後、エージェントを起動させます。
$ sudo chkconfig awslogs on
$ sudo service awslogs start
セットアップ(Redhat Enterprise Linux)
Redhat Enterprise Linuxは「RHEL-6.5_HVM_GA-x86_64-7-HVM-Hourly2 (ami-53641e52)」を選択しました。
セットアップ方法はCentOSと同じ手法で問題ありませんでした。
セットアップ(Windows Server)
Windows Serverは「Windows_Server-2012-R2_RTM-English-64Bit-Base-2014.12.10 (ami-b67e73b7)」を選択しました。
作業前に日本語化を行っておきます。
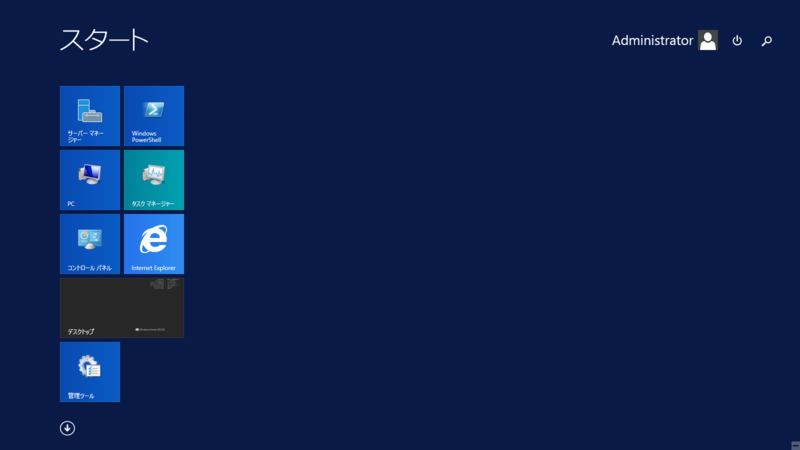
スタートメニューからアプリケーション一覧を選択し、「EC2ConfigService Settings」をクリックします。
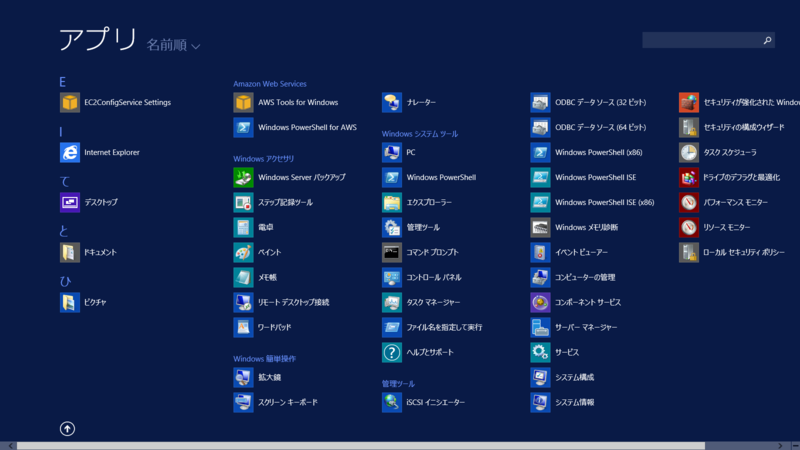
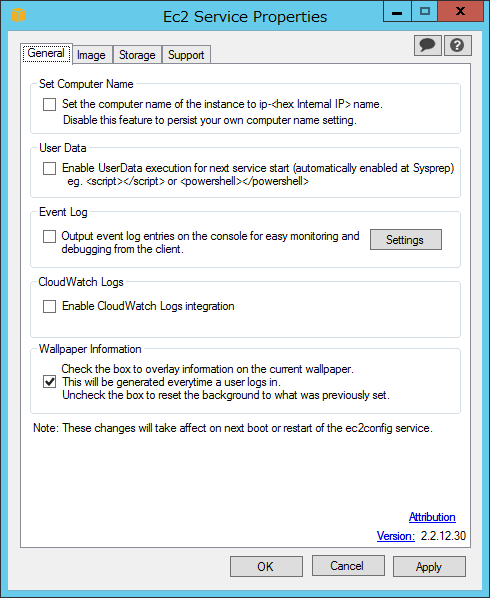
「Enable CloudWatch Logs integration」のチェックをオンにし、設定を有効にします。
以下のファイルをテキストエディタで編集します。
「%PROGRAMFILES%\Amazon\Ec2ConfigService\Settings\AWS.EC2.Windows.CloudWatch.json」
今回はログの転送先を東京リージョンに変更します。
{
  "Id": "CloudWatchLogs",
  "FullName": "AWS.EC2.Windows.CloudWatch.CloudWatchLogsOutput,AWS.EC2.Windows.CloudWatch",
  "Parameters": {
    "AccessKey": "",
    "SecretKey": "",
    "Region": "ap-northeast-1",
    "LogGroup": "Default-Log-Group",
    "LogStream": "{instance_id}"
  }
},
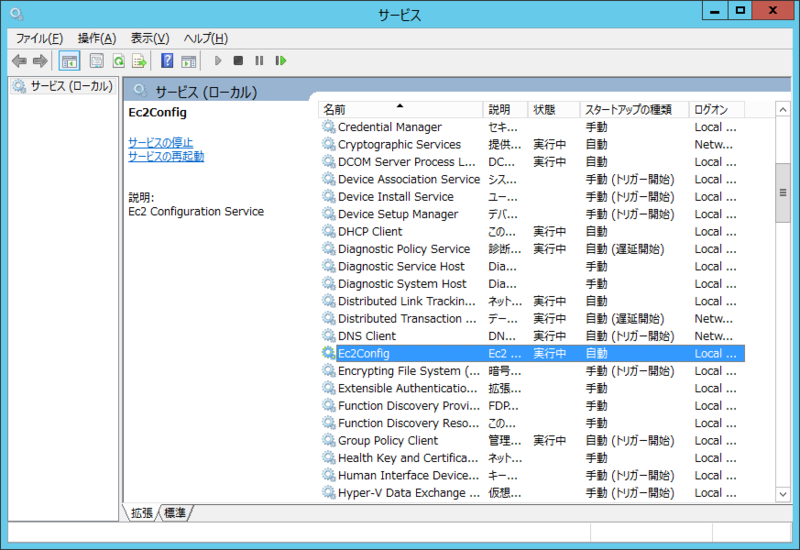
最後に、EC2Configサービスを再起動します。
マネジメントコンソールから確認してみる
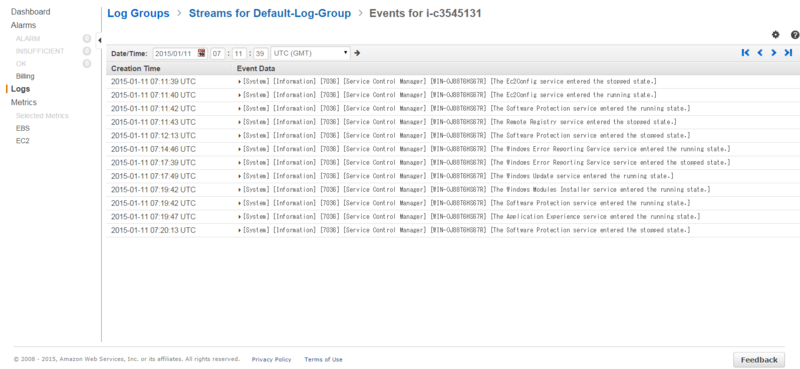
設定ができていれば、マネジメントコンソールからログを確認することができます。
下はWindows Serverのイベントログを表示させたものです。
今日はこんなところで。
test-kitchenのTIPS
test-kitchenのTIPS的なメモです。
kitchen のアップロード先を変更する
デフォルトは「/tmp/kitchen」以下に各種ファイルがアップロードされますが、
アップロードされるファイルが大量にあるとエラーになることがあるため、
私は「/var/tmp/kitchen」以下にルートディレクトリを変えて使っています。
「client.rb」も変更にあわせて指定するとパスを変えることができました。
provisioner:
  name: chef_zero
  client_rb:
    file_cache_path: /var/tmp/kitchen/cache
    checksum_path: /var/tmp/kitchen/checksums
    file_cache_path: /var/tmp/kitchen/cache
    file_backup_path: /var/tmp/kitchen/backup
    cookbook_path:
      - /var/tmp/kitchen/cookbooks
      - /var/tmp/kitchen/site-cookbooks
    data_bag_path: /var/tmp/kitchen/data_bags
    environment_path: /var/tmp/kitchen/environments
    node_path: /var/tmp/kitchen/nodes
    role_path: /var/tmp/kitchen/roles
    client_path: /var/tmp/kitchen/clients
    user_path: /var/tmp/kitchen/users
    validation_key: /var/tmp/kitchen/validation.pem
    client_key: /var/tmp/kitchen/client.pem
    encrypted_data_bag_secret: /var/tmp/kitchen/encrypted_data_bag_secret
  root_path: /var/tmp/kitchen
Chef Client のバージョンを固定する
以下のように記述すると、Chefレシピ適用対象のノードにインストールするChef Clientのバージョンを固定できます。
provisioner:
  name: chef_zero
  require_chef_omnibus: 11.16.4
今日はこんなところで。
test-kitchenを並列実行する
タイトル通りのちょっとしたメモです。
test-kitchenを並列実行したいときは、-p(--parallel)オプションをつけると並列でレシピの適用を行えます。
$ kitchen help converge
Usage:
  kitchen converge [INSTANCE|REGEXP|all]

Options:
  -c, [--concurrency=N]              # Run a converge against all matching instances concurrently. Only N instances will run at the same time if a number is given.
  -p, [--parallel], [--no-parallel]  # [Future DEPRECATION, use --concurrency] Run a converge against all matching instances concurrently.
  -l, [--log-level=LOG_LEVEL]        # Set the log level (debug, info, warn, error, fatal)

Description:
  The instance states are in order: destroy, create, converge, setup, verify, destroy. Change one or more instances from the current state to the converge
  state. Actions for all intermediate states will be executed. See http://kitchen.ci for further explanation.
以下は実行してみた例です。
# kitchen converge -c 2 -p
-----> Starting Kitchen (v1.2.2.dev)
-----> Converging <centos5-32-base-centos>...
       Preparing files for transfer
       Resolving cookbook dependencies with Berkshelf 3.1.3...
-----> Converging <centos5-64-base-centos>...
       Preparing files for transfer
       Resolving cookbook dependencies with Berkshelf 3.1.3...
       Removing non-cookbook files before transfer
       Preparing data bags
       Preparing environments
       Preparing nodes
       Preparing roles
-----> Installing Chef Omnibus (11.16.4)
       downloading https://www.getchef.com/chef/install.sh
         to file /tmp/install.sh
       trying wget...
       trying curl...

       curl: (51) SSL: certificate subject name '*.chef.io' does not match target host name 'www.getchef.com'
       trying perl...
       A URI can't be a ARRAY reference at /usr/lib/perl5/vendor_perl/5.8.8/LWP/Simple.pm line 94
       trying python...
       Downloading Chef 11.16.4 for el...
       downloading https://www.chef.io/chef/metadata?v=11.16.4&prerelease=false&nightlies=false&p=el&pv=5&m=i686
         to file /tmp/install.sh.4791/metadata.txt
       trying wget...
       url      https://opscode-omnibus-packages.s3.amazonaws.com/el/5/i686/chef-11.16.4-1.el5.i686.rpm
       md5      b83a4dd153f65ef771af50f082951cae
       sha256   733508a72f16d998d6713a72b514e439f473fb1da5a7593b7c340a0c09cad4ef
       downloaded metadata file looks valid...
       downloading https://opscode-omnibus-packages.s3.amazonaws.com/el/5/i686/chef-11.16.4-1.el5.i686.rpm
         to file /tmp/install.sh.4791/chef-11.16.4-1.el5.i686.rpm
       trying wget...
       Removing non-cookbook files before transfer
       Preparing data bags
       Preparing environments
       Preparing nodes
       Preparing roles
-----> Installing Chef Omnibus (11.16.4)
       downloading https://www.getchef.com/chef/install.sh
今日はこんなところで。
参考
- [What means the opts attribute in Test-Kitchen commands?:title=http://stackoverflow.com/questions/22178777/what-means-the-opts-attribute-in-test-kitchen-commands]
kitchen-sshを使ったtest-kitchenをchef-zeroに対応させてみる
今後はchef-zeroへ、ということで、
この前試したtest-kitchenでserverspecを使ってみる
の環境を変えてみました。
なお、chefを実行する環境はchefdkを使っています。
gemのインストール
chefdkインストール後、以下のgemをインストールしています。
- busser-serverspec
- serverspec
- kitchen-ssh
- knife-solo(不要かも)
- knife-zero
設定ファイル
「knife.rb」に以下を追記します。
chef_server_url 'http://127.0.0.1:8889'
local_mode true
また、「.kitchen.yml」を以下のように変更します。
---
driver:
  name: ssh
  username: root
  ssh_key: /<your_user>/.ssh/id_rsa
  sudo: true

provisioner:
  name: chef_zero

platforms:
  - name: centos

suites:
  - name: centos5_32_base
    driver:
      hostname: xxx.xxx.xxx.211
    run_list:
      - recipe[ntp::default]
    attributes:

  - name: centos5_64_base
    driver:
      hostname: xxx.xxx.xxx.212
    run_list:
      - recipe[ntp::default]
    attributes:

  - name: centos6_32_base
    driver:
      hostname: xxx.xxx.xxx.213
    run_list:
      - recipe[ntp::default]
    attributes:

  - name: centos6_64_base
    driver:
      hostname: xxx.xxx.xxx.214
    run_list:
      - recipe[ntp::default]
    attributes:

busser:
  sudo: true
後は同じように使うことができました。
これで大丈夫…?
今日はこんなところで。
ohaiをserverspecから使う
久々のエントリです。
serverspecを使って、テストを書く事が増えてきたのですが、
serverspecからohaiを呼び出して使いたいなーと思って調べていました。
…と、そのものずばりのやり方があったため、参考にさせていただいて試してみました。
spec_helper.rbに以下のように記述し、ohaiを呼び出せるようにしました。
※serverspecのversion1に対応した書き方になっています。
require 'serverspec'

$LOAD_PATH.concat Dir.glob('/opt/chef/embedded/lib/ruby/gems/1.9.1/gems/*/lib')
require 'ohai'
ohai = Ohai::System.new
ohai.all_plugins
$ohaidata = ohai.data

include SpecInfra::Helper::Exec
include SpecInfra::Helper::DetectOS

RSpec.configure do |c|
  if ENV['ASK_SUDO_PASSWORD']
    require 'highline/import'
    c.sudo_password = ask("Enter sudo password: ") { |q| q.echo = false }
  else
    c.sudo_password = ENV['SUDO_PASSWORD']
  end
end
次にテストケースです。ローカルにインストールしたperlモジュールの存在チェックをしていたのですが、32bit/64bitでパスが変わるため、ohaiの情報を使ってみたところです。
require 'spec_helper'

arch = $ohaidata['kernel']['machine']

describe file("/usr/local/perl/lib/#{arch}-linux/List/MoreUtils.pm") do
  it { should be_file }
  it { should be_mode 444 }
  it { should be_owned_by 'user' }
  it { should be_grouped_into 'user' }
end
ohaiとserverspecを組み合わせると、より柔軟なテストケースがかけそうなので、
色々と試してみようと思います。
今日はこんなところで。