CloudWatch Logsを試す
今日はCloudWatch Logsを試します。
IAMの設定
CloudWatch Logsを使うために、IAM Roleを用意しておきます。
以下のようなIAM Roleを用意しておきます。
{
  "Version": "2012-10-17",
  "Statement": [
    {
      "Effect": "Allow",
      "Action": [
        "logs:*"
      ],
      "Resource": [
        "arn:aws:logs:*:*:*"
      ]
    }
  ]
}
インスタンス起動時に、このIAM Roleを設定します。
セットアップ(Amazon Linux)
Amazon Linuxは「amzn-ami-hvm-2014.09.1.x86_64-ebs (ami-4985b048)」を選択しました。
Amazon Linuxの場合は、yumでエージェントをインストールすればOKです。
$ sudo yum install awslogs
その後、エージェントを起動させます。
$ sudo chkconfig awslogs on
$ sudo service awslogs start
セットアップ(CentOS)
CentOSは「CentOS 6 x86_64 (2014_09_29) EBS HVM-74e73035-3435-48d6-88e0-89cc02ad83ee-ami-a8a117c0.2 (ami-13614b12)」を選択しました。
CentOSの場合はセットアップスクリプトをダウンロード、実行します。
初期設定で東京リージョンを指定しました。
$ wget https://s3.amazonaws.com/aws-cloudwatch/downloads/latest/awslogs-agent-setup.py
$ sudo python ./awslogs-agent-setup.py --region ap-northeast-1
Launching interactive setup of CloudWatch Logs agent ...

Step 1 of 5: Installing pip ...DONE

Step 2 of 5: Downloading the latest CloudWatch Logs agent bits ... DONE

Step 3 of 5: Configuring AWS CLI ...
AWS Access Key ID [None]:
AWS Secret Access Key [None]:
Default region name [ap-northeast-1]:
Default output format [None]:

Step 4 of 5: Configuring the CloudWatch Logs Agent ...
Path of log file to upload [/var/log/messages]:
Destination Log Group name [/var/log/messages]:

Choose Log Stream name:
  1. Use EC2 instance id.
  2. Use hostname.
  3. Custom.
Enter choice [1]: 1

Choose Log Event timestamp format:
  1. %b %d %H:%M:%S    (Dec 31 23:59:59)
  2. %d/%b/%Y:%H:%M:%S (10/Oct/2000:13:55:36)
  3. %Y-%m-%d %H:%M:%S (2008-09-08 11:52:54)
  4. Custom
Enter choice [1]: 1

Choose initial position of upload:
  1. From start of file.
  2. From end of file.
Enter choice [1]: 1
More log files to configure? [Y]: N

Step 5 of 5: Setting up agent as a daemon ...DONE


------------------------------------------------------
- Configuration file successfully saved at: /var/awslogs/etc/awslogs.conf
- You can begin accessing new log events after a few moments at https://console.aws.amazon.com/cloudwatch/home?region=us-east-1#logs:
- You can use 'sudo service awslogs start|stop|status|restart' to control the daemon.
- To see diagnostic information for the CloudWatch Logs Agent, see /var/log/awslogs.log
- You can rerun interactive setup using 'sudo ./awslogs-agent-setup.py --region ap-northeast-1 --only-generate-config'
------------------------------------------------------
その後、エージェントを起動させます。
$ sudo chkconfig awslogs on
$ sudo service awslogs start
セットアップ(Redhat Enterprise Linux)
Redhat Enterprise Linuxは「RHEL-6.5_HVM_GA-x86_64-7-HVM-Hourly2 (ami-53641e52)」を選択しました。
セットアップ方法はCentOSと同じ手法で問題ありませんでした。
セットアップ(Windows Server)
Windows Serverは「Windows_Server-2012-R2_RTM-English-64Bit-Base-2014.12.10 (ami-b67e73b7)」を選択しました。
作業前に日本語化を行っておきます。
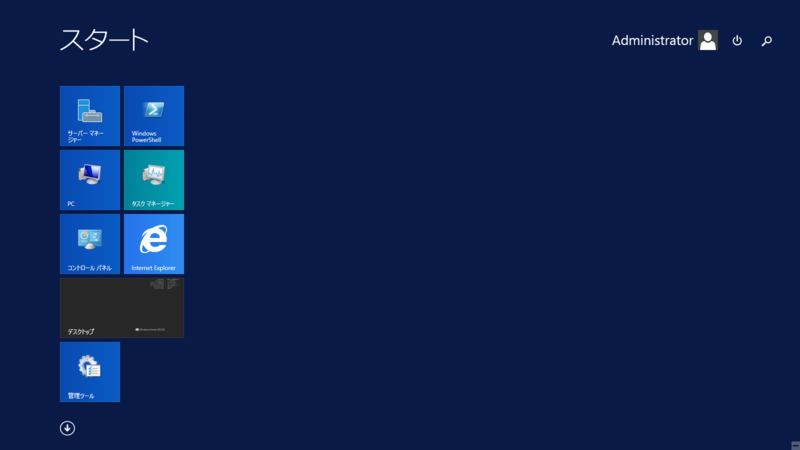
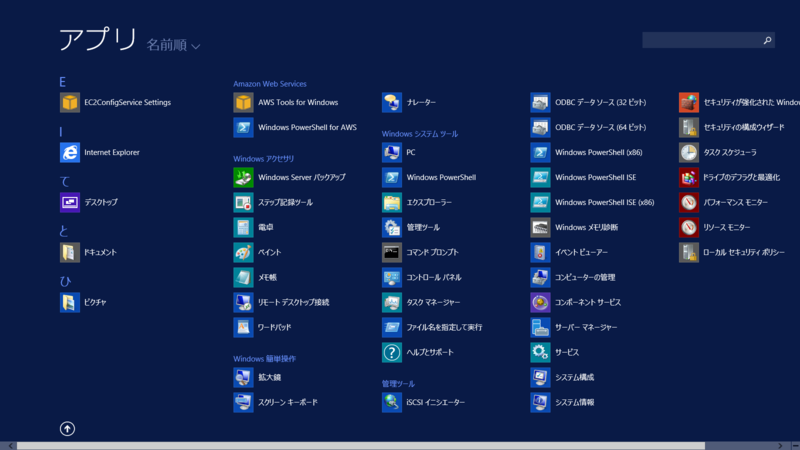
スタートメニューからアプリケーション一覧を選択し、「EC2ConfigService Settings」をクリックします。
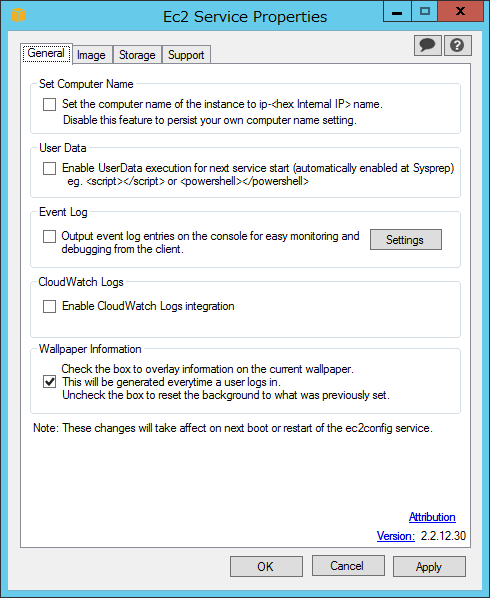
「Enable CloudWatch Logs integration」のチェックをオンにし、設定を有効にします。
以下のファイルをテキストエディタで編集します。
「%PROGRAMFILES%\Amazon\Ec2ConfigService\Settings\AWS.EC2.Windows.CloudWatch.json」
今回はログの転送先を東京リージョンに変更します。
{
  "Id": "CloudWatchLogs",
  "FullName": "AWS.EC2.Windows.CloudWatch.CloudWatchLogsOutput,AWS.EC2.Windows.CloudWatch",
  "Parameters": {
    "AccessKey": "",
    "SecretKey": "",
    "Region": "ap-northeast-1",
    "LogGroup": "Default-Log-Group",
    "LogStream": "{instance_id}"
  }
},
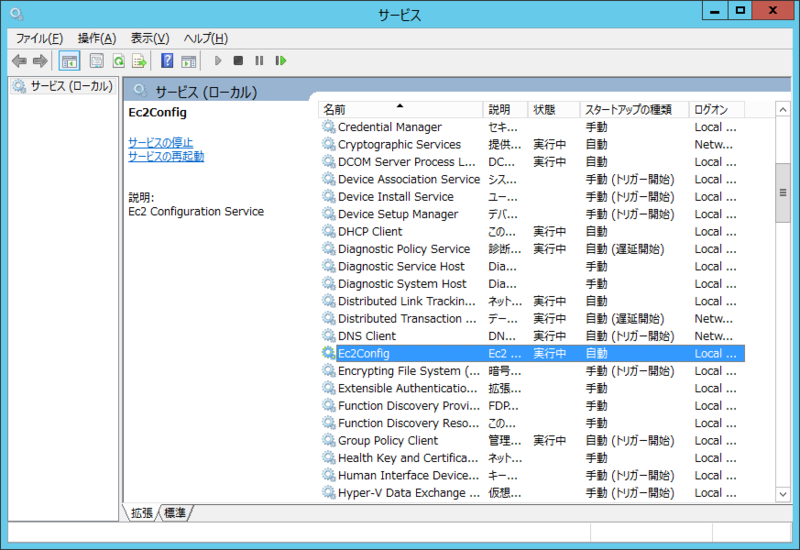
最後に、EC2Configサービスを再起動します。
マネジメントコンソールから確認してみる
設定ができていれば、マネジメントコンソールからログを確認することができます。
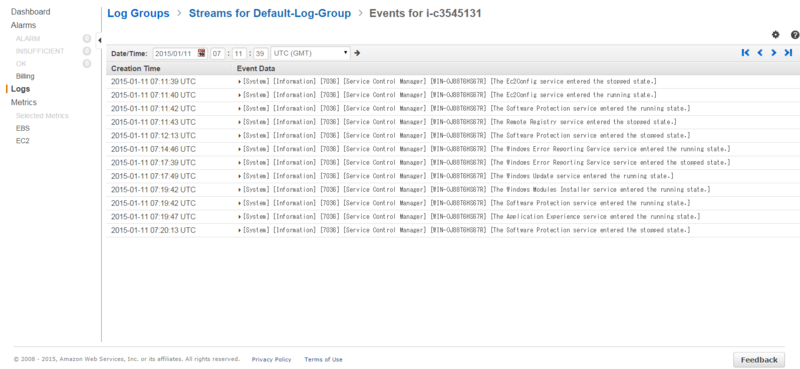
下はWindows Serverのイベントログを表示させたものです。
今日はこんなところで。